How To Calibrate A Bimetal Thermometer
Why Calibration Is Important
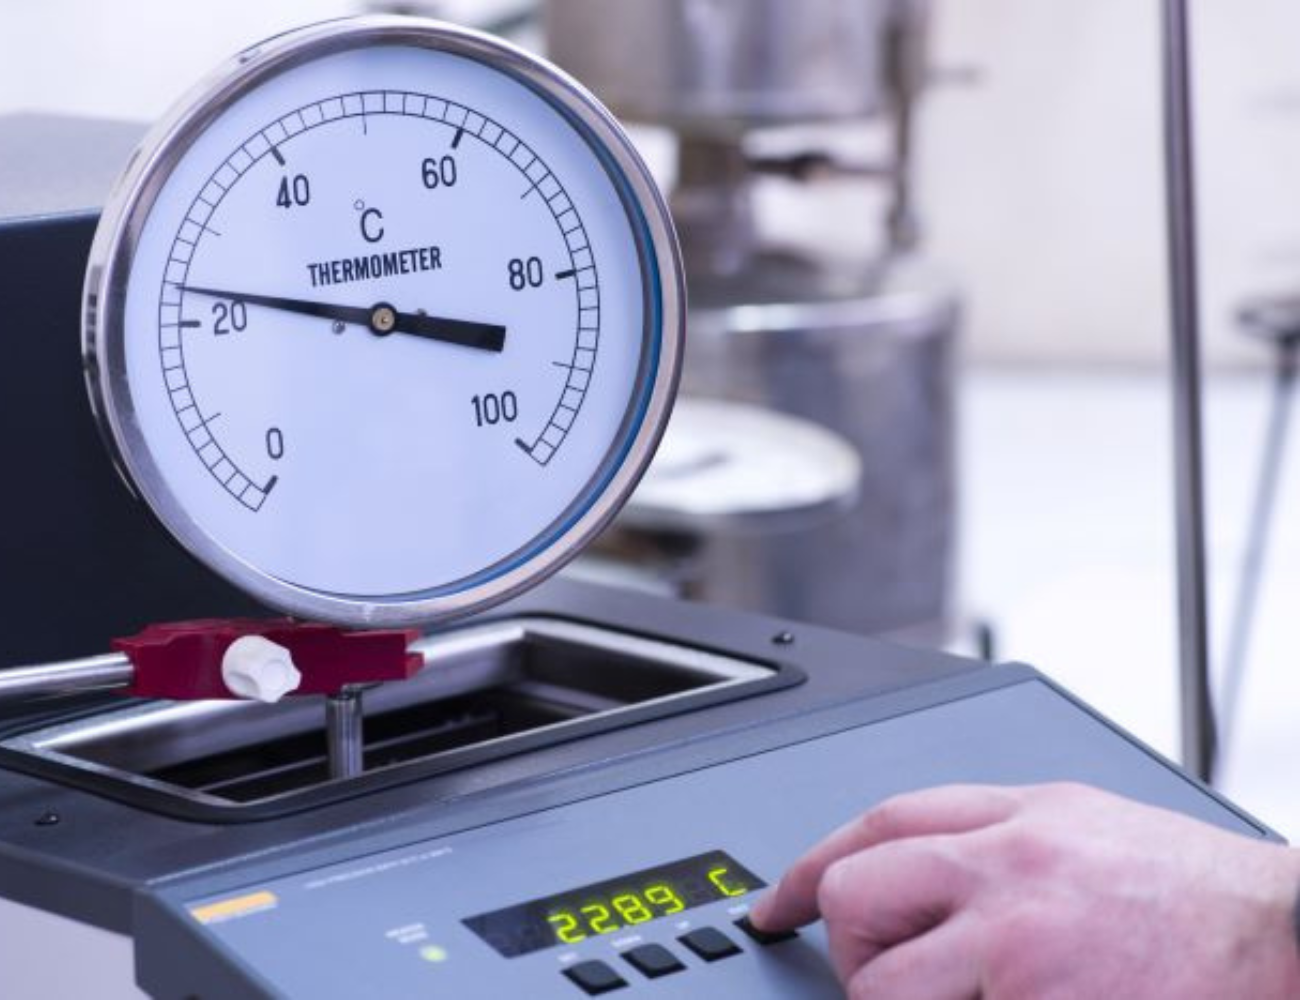
Proper calibration provides confidence in knowing the temperature you are reading is correct. Depending on your application, this can be extremely important for procedures that require precise control. Thermometers should read within 2° of the actual temperature to be considered accurate. (+/- 1.1° C)
Know before you go. Please Note: If you have a Liquid-in-Glass Thermometer, GIVE IT TO A PROFESSIONAL. If there is NO adjustment nut or calibration screw, GIVE IT TO A PROFESSIONAL. Typically the calibration screw can be found on the back of your unit. Although applications vary, when in doubt, play it safe.
Instrumart also has a state-of-the-art calibration lab for industrial instrumentation. Customers can request a calibration for their instrumentation or learn about the services offered in the Instrumart Calibration Lab.
Preparing to Calibrate Your Bimetal Thermometer
Bimetal Calibration Equipment Options
- Constant Temperature Bath
- Dry Block Calibrator- This is the method we will be using in our example. As a general rule of thumb, the dry block or other source of accuracy should be four times better than the device under test. This is typical for most calibrations.
Prerequisites
- 1 Hour Warm-up Time for Proper Stabilization
- Temperature: 23 +/- 5 deg C
- Humidity: 50 +/- 30%
- Perform 3 Trials for Each Point or Range
- Measurement Data Sheet (MDS)
Required Equipment
- One temperature calibrator.
- Some popular types include: Metrology Well, Liquid Bath Calibrators, Dry Block Calibrators, or Dry Bath Temperature Calibrators
- Thermo-Hygrometers - For Temp. & Humidity Monitoring
- Other names include: Humidity Meters
- Cleaning Supplies
Calibration Procedure for Bimetal Thermometers
- Take proper care and precautions, temperature calibrators generate extreme temperatures, which can be dangerous and potentially cause burns.
- Look for any visual defects that may affect the accuracy. Do not proceed if you find errors.
- Clean thermometer to the best of your ability
- Prep the measurement data sheet with the necessary information to identify the unit. (Brand, Product, Serial #)
- Determine the range of the thermometer, equally divide the range based on the scale, and choose at least three or more test points based on the user's needs.
- Power on your Temperature Calibrator and set the desired temperature. Once it is fully stabilized, going from low to high heat, insert the probe into the holes of your calibrator.
- Note: There are different sized holes for different size probes; choosing the correct one ensures maximum heat absorption and accuracy.
- Wait for display to stabilize (typically takes 15 min.), after tapping the face once, record the reading in the MDS.
- Wait two more minutes and get another reading. Repeat this process three times.
- Continue steps 7 and 8 until all setpoints are complete.
- Cross-reference level of accuracy provided by the manufacturer and your readings. (ie. accuracy = +/-1.5 % of Full Scale)
- Readings within limits can be labeled, sealed, and issued to its owner. If NOT within the listed limits, perform necessary repairs or adjustments.
- End of Verification
To achieve the best accuracy, follow the recommended stabilization time, and ensure a proper immersion of stem or probes by tapping the face while taking a reading.

Still Need Help? Call an Engineer Today
If this post still leaves you wondering what type of industrial instrumentation would work best for your application, our engineers would be happy to help you. Give them a call at 1-800-884-4967. Or, you can shop for a wide range of industrial instrumentation from top brands and even configure your product online. We offer free lifetime tech support with every product sold.